I have started with possibly the most simplest of thrifting projects, in my last post i spoke about now saving for my own little shop. Penny by Penny i will get there, so as my spending ban starts, i have decided to get thrifty……So lets get thrifty.
What you will need :
A jar with a lid (any size)
Paint brush (fine) (thick)
A choice of 2 colours (enamel or acrylic paint)
white paint
Gloss varnish or nail varnish
Palette or plate (to use to mix the colours)
![]()
To start off with is a large empty jar, i thrifted this one from an old olive shop, it is perfect size for all my pennies.
- Make sure you clean the jar throughly and dry it you don’t want the jar to sweat, and make your coins rusty.
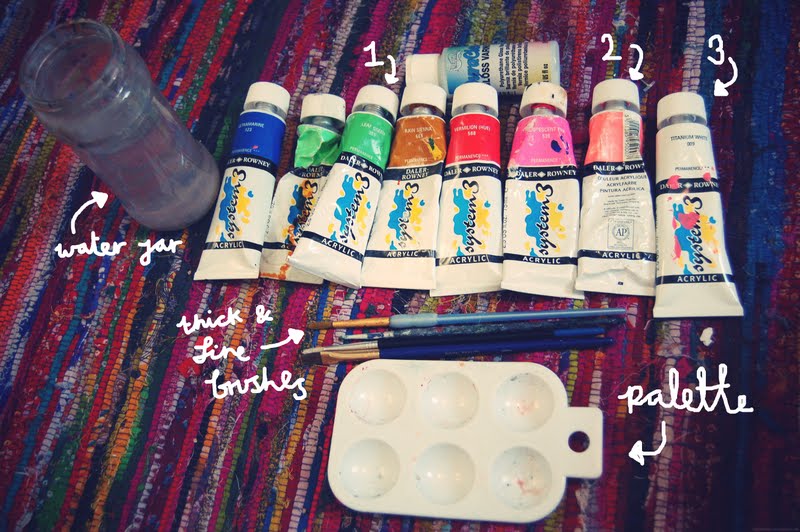
Next you need to grab up any paint you have it has to be plastic or enamel based so it is able to get a hold onto the glass, i decided to use system 3 Acrylic paint. I decided to choose
- leaf green 355
- Fluorescent Red 544
- titanium white 009
I mixed the Fluorescent red and white to create a lovely pink colour i decided to free-hand the writing on to the front if the jar if you don’t have confidence to hand- draw the writing on the front you can practice the on a piece of paper and feed it through the top so you can see the writing through the jar. Use the finer paint brush for the writing.

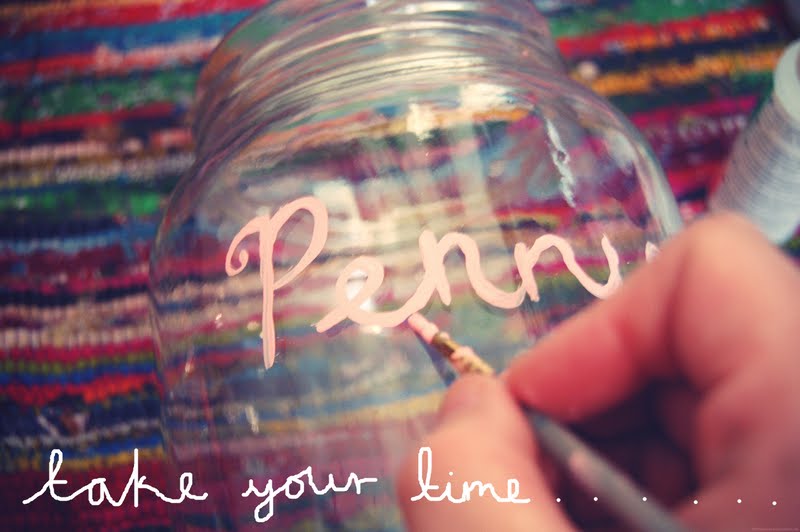
I decided that on the front that i wanted the writing to be stylized on the front i wrote Pennies, you will see in a second why i wrote this.


On the back of the jar i wrote ella’s, so that when you look through the jar my name gives the writing a 3d look, (you will have to paint backwards) its pretty simple, once this has dried you can use your clear varnish to cover over the words just so it doesn’t chip.
Now if you have the lid ready, make a little slit in the top, flip over the lid and place blue tack on the back and pierce it a pair of scissors or a sharp point make a hole in the top and then take a fork or knife and wiggle it back and forth to make the hole/slit bigger enough to fit a 50p in.
Now onto the lid… paint it with the other colour you have i chose to mix the green and white to create creamy green and use the un mixed green paint to write the text, i did orignally paint it pink but it was pink over load hehe, once this is dry, varnish the lid so that it cant be chipped with the endless pennies that you are going to drop in..
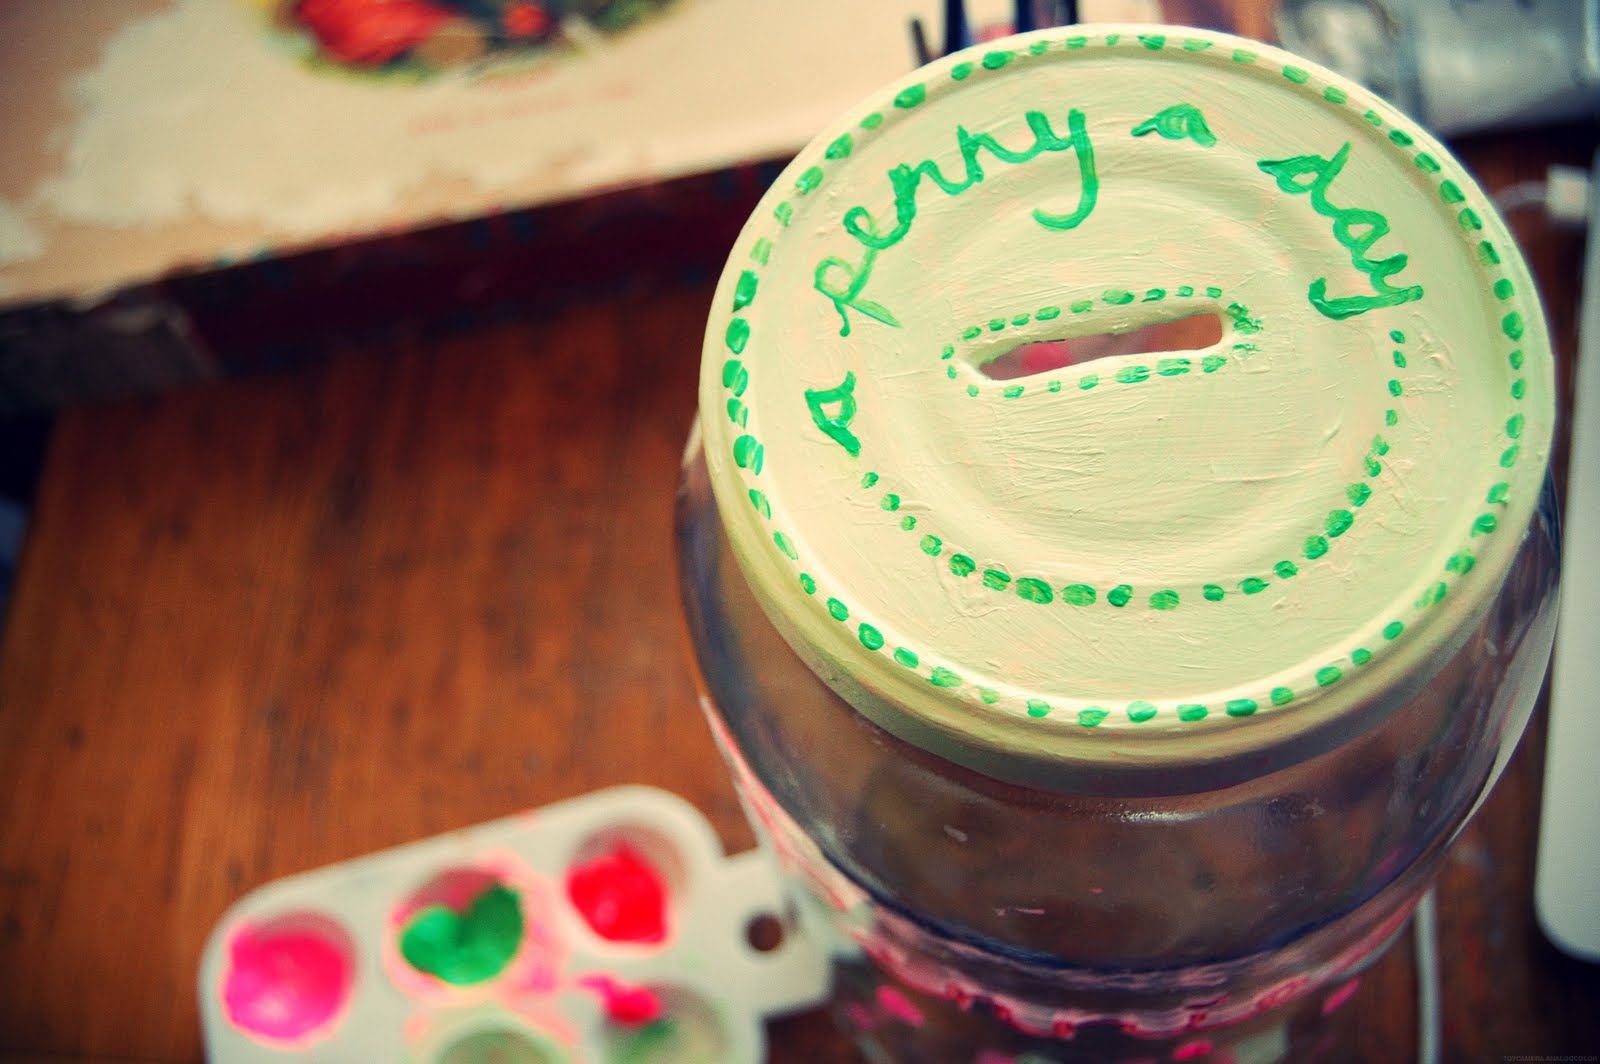

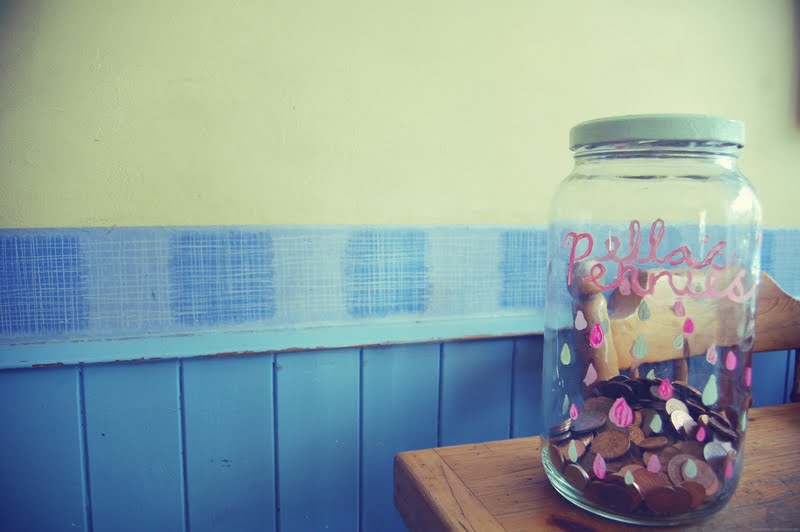
I decided to paint little drops in both pink and green, voila!
This is just a simple thrift, i want to go on to show a few more pieces in jewellery, fashion and other pieces i have been working on. I hope people like the little penny jar i created.
If there are any thrift up-style creations you would like me to show how to make and do up please get in touch.

I want to make one 🙂 I love this!!!
This is an adorable and simple DIY! Looks effective, I love your cute design. The little waterdrops you painted are really so cute!
x Michelle | thefeatherden.net
this is weird to say but you have really lovely writing, like the way you write things is so lovely. I hate my writing and would love to be able to squiggly writing but NO i am shit hahaha
love this new thrifty thursday thing! I shall be keeping up to date as i need to start saving my money. Should probably do this one 😀
xx
this is amazing! i love it, you're very talented:)
xx
briliant! i'm soooo gonna do this!! x
I love this, but I'm so rubbish at saving – even change! However I've got a terramundi pot that will hopefully soon need smashing, and therefor replacing – maybe I could use this idea and just superglue the lid on so I stop myself from dipping in xx
love this Ella!! I'm gonna make one woop!
that is so cute, I'm making one this summer!
xxx
rubyccino.blogspot.com
This is a lovely idea ! I always think its crazy when I see proper money boxes that are really expensive so it defeats the object!
xxxxxx
this is such a cute idea! 🙂 xx
this is awesome, ella i love your blog its inspired me to start drawing again, even though i was up till 2 this morning watercoloring ahhaha xxx
cute! and little by little it adds up!
This is so cute, I'm definitely going to make one xx
I love this idea! Your blog is amazing and really inspirational. I love reading it!
Xenia xx
such a great idea – definitely going to make one! and i love your blog too xoxo
What an amazing idea! Sooo cool…would make a fab gift! x
Aw that's cute <3
These look adorable :')
http://www.eatthatbatman.blogspot.com
x
I did this myself but changed a few things! I'd love for you to check it out http://glittermills.blogspot.co.uk/2012/06/diy-save-it-for-rainy-day.html xxxxxx